Tips For Editing Existing Course Material
This book explores features you may have overlooked while building or managing your course content.
1. Editing Icons
You'll likely spend more time managing your course content and activities than you will creating them. Each new course brings maintenance requirements with it, including revising existing course content, updating requirements for activities (such as due dates for Assignments or open/close dates for Quizzes, and incorporating new features to enhance your course.
Familiarizing yourself with the editing interface for course content is a great launching point for the other features in this book. For now, let's focus on the editing features available on your course home page when editing is turned on.
Course Editing Icons
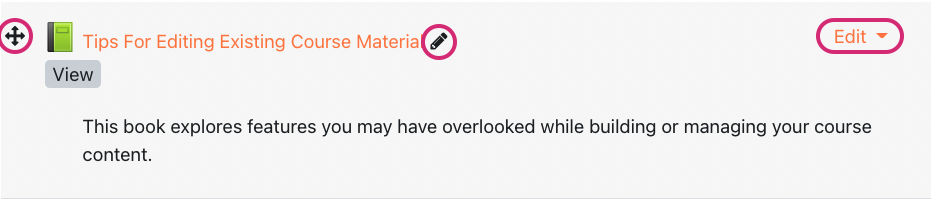
There are three editing features for course resources, activities, and topics:
- Move resource (crossed arrows)
- Edit title (pencil)
- Edit menu
Move Resource (crossed arrows)
The Move Resource feature is for rearranging content in your course. You can use it in one of two ways:
- Click, hold, and drag your content to a new spot. This is similar to how you would move a file to a folder on your computer.
- While dragging, you'll see a faint "ghost" version of your content. This indicates where the content will be replaced when you release the mouse button you're holding down.
- Click the icon once to select its new location from a menu (the content you're moving will go above the content you select in this menu).
-
- This option is best used when you're moving your content a significant distance in your course (e.g. the bottom of the page to the top).
- It can sometimes feel overwhelming if you're moving content since the menu that appears will display all content in your course.

Edit Title (pencil)
Clicking this icon will open a text field that allows you to rename that content or topic without having to open its settings. Remember to hit the Enter key when you're done updating the name, or your changes won't save!
Edit Menu
 The Edit menu is a quick way to make (or access) quick edits for course content. These include:
- Accessing the content-specific settings for that activity or resource
- Indenting the content left or right (this is a nice way to make content more skimmable on your course home page)
- Quickly hide that content from learners (this setting overrides any Restrict Access or activity settings related to the content's visibility)
- Duplicate the content (some instructors use duplicate on an Assignment or Quiz that's configured with their preferred settings, then they just update the due date and prompt(s))
- Assign specific roles to specific users just within that activity (this is highly dependent on the permissions assigned to your instructor role, and roles that exist on your site at the activity level)
- Delete the content (you will be prompted to confirm you want to do this, and as mentioned in Using the Recycle Bin, your content will move to the course Recycle Bin for 7 days before it's permanently deleted.
Note: The Editing menu for course topics is slightly different, but still includes options to edit, hide, or delete the topic. Some course formats have an additional option to highlight a topic, which will provide a visual indication to learners that it's the current topic.