Tips for Troubleshooting
| Site: | Tri-City United Moodle Site |
| Course: | Orientation for Admins - v3.11 |
| Book: | Tips for Troubleshooting |
| Printed by: | Guest user |
| Date: | Saturday, July 19, 2025, 6:01 PM |
1. Reviewing Course Logs
Logs are activity reports that are available at the site and course levels. These can be extremely useful when troubleshooting issues reported by instructors or learners. In Boost, Logs can be found by clicking the gear icon in the top-right corner of the course home page, selecting More at the bottom, then Logs in the Reports section on the following page. In Fordson, Logs can be found by opening the Course Management Panel and clicking Logs in the User Links column.
To generate a log, you can select any combination of filters, which include group, participant (instructor or learner), date, activity, action, source, or event, then click the "Get these logs" button.
Example: A common use of Logs is to verify a learner submitted an assignment when they indicated they did. To do that, select the learner in the list of Participants, select the assignment from the list of activities, then click the "Get these logs" button.

It's also possible to view logs for users at the Site level as well if you have an administrator role. To access the site-level Logs: Go to the Site Administration link in the nav drawer, then the Reports tab, then click Logs. Be sure to select the option with (site) alongside. Select your user and this will show you all activity for that user site-wide, rather than in one particular course.

2. User Tours
User Tours are a user onboarding feature built into your site. User Tours help you create self-paced, step-by-step guides to introduce your users to new or upgraded features. These tours can point to specific elements on the page, require users to click on something, and can include formatted text, links, images, and videos. Any Client Admin or site administrator can create a User Tour, which is located in Site Administration.
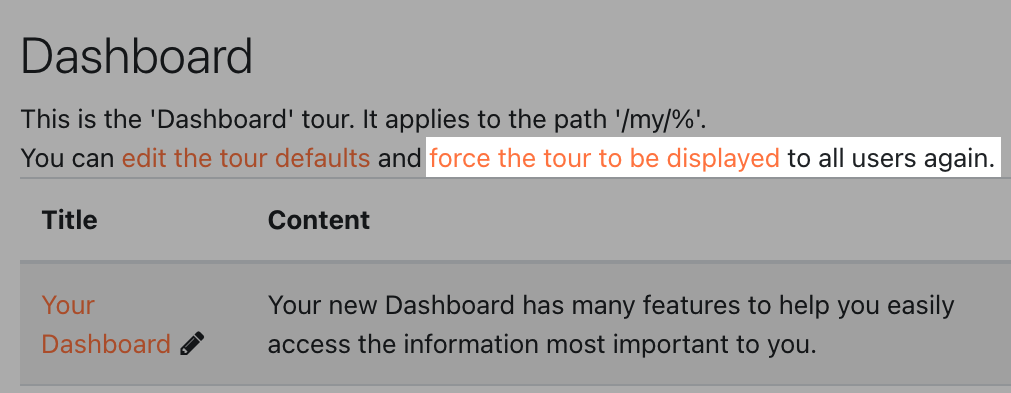
User Tours will only display to a user once. Users can reset a tour to display again by clicking the "Reset user tour on this page" link in the footer.

A tour can also be reset for all users by an administrator or client admin. Open the User Tour in Site Administration, then click the "force the tour to be displayed" link.
Where User Tours Can Be Displayed
Filters for User Tours allow you to target them to one of four areas of your site:
- Site Level Tours: These are typically displayed on a page all users can see, like the frontpage, dashboard, or user profile page.
- Category Level Tours: These tours will only display in all courses in a specified category, including that category's subcategories.
- Course Level Tours: These tours are targeted to either a specific course, or all courses on your site.
- Activity Level Tours: Tours can also be triggered the first time users open specific activities.
Ideas For User Tours
- One-off Site Announcements: Since User Tours only display once, and can display to all users on the frontpage or dashboard, they make good candidates for simple announcements to all users.
- Introducing New Features: If you've added a new plugin, or are rolling out a new feature as part of a site upgrade, a User Tour is a great way to introduce users to how to access and use it.
- Guiding Users Through A Process: Some clients add custom fields to user profiles, and make these fields required. If a required profile field is empty when a user logs in, they'll be taken directly to the profile editing page and will not be able to access the site until they update the required field. Some clients have built a User Tour to guide users to the required field, giving them more direction about why they're on the profile editing page, and what to do next.
- Pre-emptively Addressing Common Support Issues: Higher education clients in particular field a lot of questions about course availability at the beginning of each semester. A User Tour that reminds learners their courses won't be visible unless their instructor(s) make the course visible to them can help cut off several support requests.
2.1. Creating User Tours
Follow the steps below to create a new user tour.
If you are using the Client Admin Role, navigate to Site Administration > User Tours. If you are a full site administrator, navigate to Site administration > Appearance > User tours. You will now see a list of your existing user tours, along with three button options:
- Create a new tour - click on this to create a new tour
- Import tour - click on this to upload a tour file (in .json format)
- Tour repository
Select Create a new tour, and then name and describe it. Within the space for “Apply to URL match” you’ll indicate what page(s) will offer this user tour. A few examples are:
- The Dashboard: /my/%
- Site Home Page: FRONTPAGE
- A User Profile field: /user/profile.php%
- A Course Page: /course/view.php?id=2
- NOTE: Be sure to include the correct course ID here. Leaving off the ID number will apply the tour to all courses. IE: /course/view.php%
Tours can also be filtered to display based on:
- User Role
- Theme
- Category
- Course
- Course Format
- Account creation
- First access
- Last access
Additional Settings
- Placement: Top, Bottom (Default), Left, Right. This determines where the step shows relative to its matching block or CSS selector on the page.
- Show if target not found: No (Default), Yes. This determines whether the step is shown or not when the target has not been found.
- Show with backdrop: No (Default), Yes. If yes, the step appears surrounded by a darkened backdrop to emphasis its content and location.
- Move on click: No (Default), Yes. If yes, the tour continues to the next step when the user clicks within the block or area targeted by the current step.
Now that you’ve created the shell for your tour, you can begin to build it out. This is somewhat easier if you have experience working with CSS, but most clients have learned to create their own tours with a bit of research and preparation.
Adding Steps to Your User Tour
Each "step" in the User Tour is a card that displays on screen. To create a new step, click on the "New step" link. Select the appropriate type, or area, of the page to highlight:
- Block: Displays next to a matching block on the page.
- You might choose to use this if you want to highlight the Quickmail block, the calendar, or anything else you’ve newly displayed on the page(s).
- CSS Selector: Displays next to a matching selector on the page.
- Use this if you need to point to a specific element on the page.
- Display in the middle of the page: For, well, displaying User Tour cards in the middle of the page.
- These are most useful when you need to convey information, but it doesn't have to point to something specific on the page.
If you select Block, select the relevant block from the dropdown. For CSS selectors, type or paste in the relevant selector to identify the target. You can find more information about CSS selectors on the wiki page for User Tours.
Next, add the title and content for the card. Then configure your display settings:
- For all types, select whether to display the step with a darkened backdrop. We strongly recommend using this setting if you're calling out a specific area of the page, or your site uses a very light theme.
- For blocks or selectors:
- Select the Placement option for where to place the display (above, below, left, or right).
- Select whether to display the step if its target isn’t found.
- Select whether to move on click, which means the users will have to click on the thing the User Tour is pointing at before they can move to the next step.
Click "Save changes". Your new step will appear at the end of your tour’s current listed steps.
Each individual step has the following Actions options:
- Move Up and/or Down: to reorder the steps
- Edit: to edit the step settings
- Delete: to delete the step entirely
Continue adding new steps until your tour is completed.
Notes to Consider
- You can have multiple tours created for the same page destination, but you should only have one per page enabled at one time.
- Tours can be duplicated on the User Tours page. If you have one that works well, consider duplicating and editing it to create new, similar tours.
- Tours can be downloaded and imported on the User Tours page. Some clients will use their dev site to create new User Tours in advance of a site upgrade, then download the tours from dev and upload them to production.
- When testing a User Tour, we suggest filtering it so it only appears to Client Admins and/or Site Administrators. This will give you a chance to test your tour before your users see it.
3. Browsing All Users
Browsing the list of users in your Moodle site is an efficient way to:
- Locate users who've requested help.
- Identify users who haven't logged in during a specific time period.
- Identify duplicate accounts.
To access this page, open Site Administration, select the Users tab, then click Browse List of Users.

From this screen you can search by name, or expand the filter section which will allow you to search by various fields, including role.

Once you have located a user, you can click on their name to view their profile and see all of the courses the user has access to.

If you click on a link to a course in the user’s profile, you will view their profile within the context of that course, and can then click on the link to the course within the breadcrumb trail bar across the top of the page to view the main page of the course and investigate the issue at hand. You can also click "Log in as" in the Administration section to log in as that user. This feature is covered in the User Roles and Contexts book in this course.
4. Searching for Existing Courses
Although browsing for users is generally the most efficient way to troubleshoot issues reported by individual instructors or learners, searching for courses can be just as useful. Using the “Search courses” field that appears in the center of your Site Home (frontpage) page, you can type in the code or name of a course. (Note: Your site may be configured to not display the frontpage if you are using the Dashboard.)
We recommend searching by specific elements of the course name that are unique (like an id number). You can also use a code and/or year/term to filter through all courses. Depending on the course naming convention on your site, you can also use the “%” wildcard to narrow the list of results. For example, you could search for %MATH%2021-22% to find any courses with MATH in the name within the 2021-2022 school year.
It is a common practice for administrators to ask instructors to include either the course shortname or a direct URL when submitting help requests to aid the support process.
Note: As an administrator you may want to change your personal preference to display the Site Home page by default instead of the Dashboard. This will provide you with easy access to the course search and list of categories.