An Introduction to Your Site
| Site: | Tri-City United Moodle Site |
| Course: | Orientation for Admins - v3.11 |
| Book: | An Introduction to Your Site |
| Printed by: | Guest user |
| Date: | Saturday, September 6, 2025, 7:47 PM |
Description
This book is for new site admins, but includes tips that experienced admins may also find useful.
The Home Page (Site Home)
After logging in you're taken to either Site Home or the Dashboard. Site Home page acts as a landing page for all users, and displays useful information added by your site administrators, as well as a list of courses you're enrolled in as an instructor or learner. On the Dashboard page you'll see the list of courses that have been made available to you in the list under “Course Overview."
Note: There are multiple differences between Site Home and Dashboard. The Course Overview block displays only on the Dashboard, and the Site Home page usually shows a "My Courses" list which will contain the courses you are enrolled in. Whether you see the Site Home or Dashboard depends on the default page your institution has chosen, but both pages are usually available from your navigation drawer on the left.
Admin Tip
Site Home is a customizable page for your site. If you're a Client Admin you can submit a support request to move some elements of the page. For example, the course search box can be moved from the bottom of the page to the top, or hidden entirely. You can also add resources, activities, and blocks to Site Home as a Client Admin, making it a great spot to communicate announcements or information to your users. If you're using the Boost or Fordson theme, there is a gear icon in the top-right corner of Site Home. Click that, then select "Turn editing on" to add content to Site Home.
If Users Say They Can't See Their Courses
Please note that all of your courses on your schedule may not appear in this list. It is typically up to the instructor to make their course sites available to learners at the start of the term. If learners do not see a course they've registered for, they should ask the instructor when they can expect to gain access. We go into detail on the Dashboard in the next chapter of this book.
The Dashboard
If your institution is using the Dashboard instead of the Home page, your users will access their courses, activities and deadlines in a different way.
Admin Tip
You can update the default Dashboard page for all users on your site. Though you cannot add activities and resources, you can add and move blocks to the Dashboard, and publish those changes for all users. Adding something like an HTML block would allow you to publish a persistent announcement for all users. To update the default Dashboard page:
- Open Site Administration
- Scroll down to the Appearance heading
- If you are a full site administrator, click the Appearance tab instead
- Click "Default Dashboard Page"
- In the top-right corner of the page click the "Blocks Editing On" button
- Make your changes
- Click the "Reset Dashboard For All Users" button
Important Notes About Updating The Dashboard
- Changing your personal Dashboard while logged into your admin account will not change the Dashboard for other users on your site. You must go to the Default Dashboard Page in Site Administration to make changes, and you must click the "Reset Dashboard For All Users" button to publish those changes to all users.
- Publishing those changes will reset the Dashboard for all users on your site, overwriting any changes they have made to their personal Dashboard.
Course Overview Block
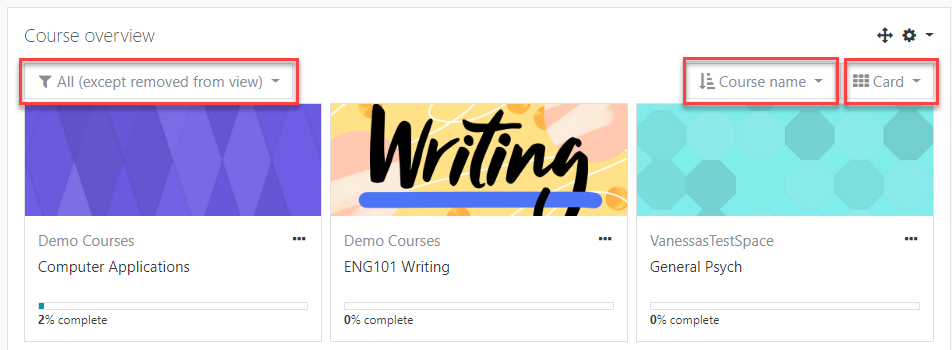
On the Dashboard they'll have a Course Overview block which displays courses they're enrolled in. The Course Overview block displays three drop-downs:
- an option to sort by all, current, future, in progress, starred or hidden courses
- an option to display courses by last accessed or by title
- an option to display course by cards, summary or list view
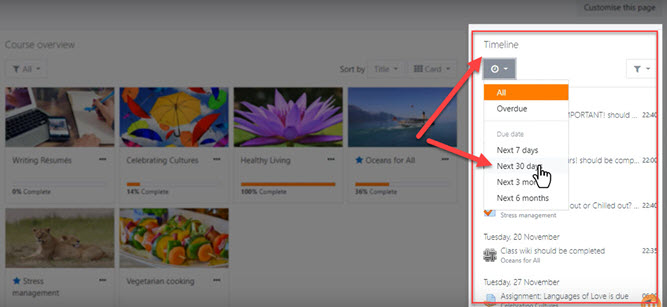
Note: You may also have the Timeline block on your Dashboard. This block contains a list of all completed, pending and overdue activities. The timeline was formerly found in the Course Overview block, but is now its own block. Users can sort and filter the items in the Timeline block. For example, users can choose to view only the activities due in the next seven days.
Past, In Progress, and Future courses
For courses to appear in the 'Past' section, the course end date must be in the past, or the course must be completed. If course completion is turned on in the course settings, the course will not appear in the 'Past' section until course completion conditions are met even if the course end date is in the past.
For courses to appear in the 'In Progress' section, they must:
- Not yet be completed
- The current date is after the course start date
- The current date is before the course end date (or there is no course end date)
Important Note: If you are at an academic institution, and do not see a course on the first day of classes, check the Future tab. As an example: If the semester begins on a Monday, but the first day of your class is Tuesday, the course start date for your class is likely Tuesday. It will appear under the Future tab instead of In Progress.
Courses 'In progress' that are displayed in the Course Overview block match the courses displayed in the navigation drawer on the left, although your site may be configured to limit the number of courses that appear there.
For courses to appear in the 'Future' section, you must be enrolled in them even though the course start date is in the future, and the instructor has to make the course visible to students. If you are enrolled in a course, and it does not appear in the In Progress or Future tabs, contact your instructor to ask if the course has been made visible to students yet.
Starred and Hidden Courses
To 'star' ('bookmark') a course click the three dots by its name and then click the star icon. To hide a course, click the three dots by its name and then click the hide icon.
Courses may be filtered by starred or hidden courses.

Percentages on the Course Overview
Activity completion is set by your course instructor and may or may not be enabled. If your instructor has enabled and configured Activity Completion for your course, you'll see a percentage on the course card in the Course Overview block. This percentage represents the percentage activities with completion requirements that you've completed. It does not indicate course completion. Your completion percentage will drop if your instructor adds or un-hides activities with activity completion.
Activity completion requirements will appear beneath and inside of activities where they've been added.User Profiles
Each user has a profile that can display a picture or avatar to represent them, a brief bio or description, and the email address associated with their account on your site. User profiles also contains important settings related to messaging and forum functionality. Users can send each other messages from a link within their profile, unless this has been disabled.
If you would like to view your own profile, click the drop down menu that appears next to your name in the top right corner of your page. Usernames and pictures (including your own) are all hyperlinked to the user's profile page. You can click on any name or picture at any time to view that user's profile page.
To edit your profile, start by accessing it through the dropdown menu next to your picture in the top right corner of the page, then click Profile. On the next page you can add a picture and change your default settings if desired. The gear menu in your profile page will bring you to some important settings related to messaging and forum post notifications that you can adjust to suit your preferences.
Admin Tips
There are some profile fields only you as an admin will be able to edit. Some fields cannot be edited by you if they are locked by an integration with an external service (such as Active Directory or an SIS).
It's possible to add additional custom fields to user profiles, and to make those fields required for all users. If you'd like to add a new field to the user profile page, and are not a full site administrator, please open a support request through (opens in new window) the Open LMS support site.
Courses
Once you enter a course, you will usually see two columns: A wide center column, and a column on the right side of the page that contains a series of Blocks. Blocks are covered on the next page of this book.
The center column is where most course content will be, including course materials, assignments, quizzes, and other activities the instructor has added. Most courses are laid out by topics (sections) or weeks. Some courses use special formats, and may display differently.
If a section notes "Not available" then the instructor may be choosing to hide it from the learners until a particular time.
Blocks
Throughout your site you will see chunks of content called Blocks. Blocks are like widgets on your phone: Specialized chunks of content that are meant to do one or two things. They usually appear in the right-hand column in your course, but may be in a different spot depending on the theme your institution is using.
Common Blocks
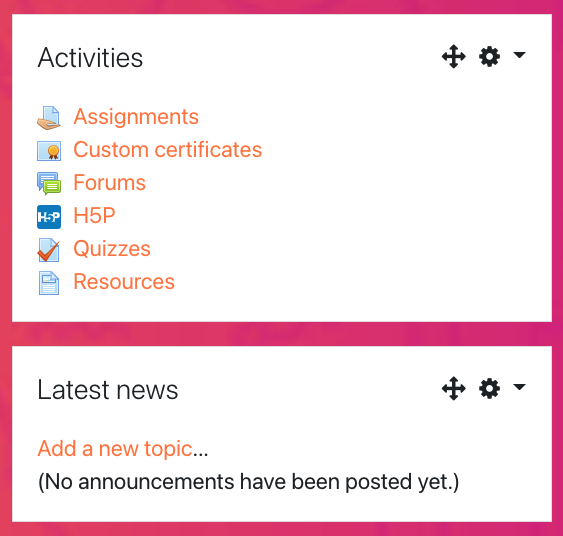
Common blocks you may see include the Activities block, which has filters to show specific types of activities in your course, and Latest News, which shows the most recent Announcements forum posts and due dates. Below you'll find more examples of blocks you'll likely see and interact with.
The Navigation block contains an expanding tree menu which includes My Home, Site Pages, My Profile, and Courses. What appears in the navigation block depends on the role of the user, where they are in your site, and any settings that have been applied globally.
 The Navigation Drawer is located in the left column of your course, and allows you to
preview the activities and resources that are linked within a given
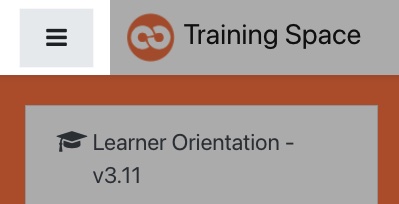
week (these may not appear depending on the course format your instructor has chosen). If you're on a smaller screen, you may want to collapse the navigation drawer. To do this, click the hamburger icon in the top-left corner of the page.
The Navigation Drawer is located in the left column of your course, and allows you to
preview the activities and resources that are linked within a given
week (these may not appear depending on the course format your instructor has chosen). If you're on a smaller screen, you may want to collapse the navigation drawer. To do this, click the hamburger icon in the top-left corner of the page.
You can also access Grades from the navigation drawer. Here you'll see all of the graded items in the course, any grades the instructor has entered, and a running total grade for each users in the course. Some grade items might be hidden by the instructor. If you can't find a grade and believe it should be visible, (opens in new window) reach out to the Open LMS support team for further assistance.
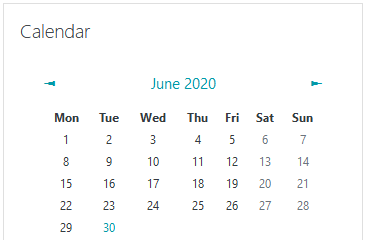
The Calendar block is another useful tool because it can highlight important dates for users. Whenever an instructor sets an opening and due date on an assignment or quiz, those dates will appear as highlighted. When users hover over that date they will see a pop-over reminder of what is opening or closing on that day.
Resources and Activities
Like any website, you can view the various resources and activities your instructor has posted within the course by clicking on the link to them. Clicking links to files may open those files automatically, or prompt you to save them to your computer.
You may hear the terms Resources and Activities. Resources are passive content, meaning learners do not have to interact with it beyond reading, watching, or listening (if possible). Resources include content like Pages, Books, and Files. Activities
are interactive content designed for learners to engage with the instructor, and possibly their peers. The primary difference between Resources and Activities is Activities require learners to share something with someone else in the course. For example, submitting a Quiz attempt, uploading your work into an Assignment, or posting to a Forum.
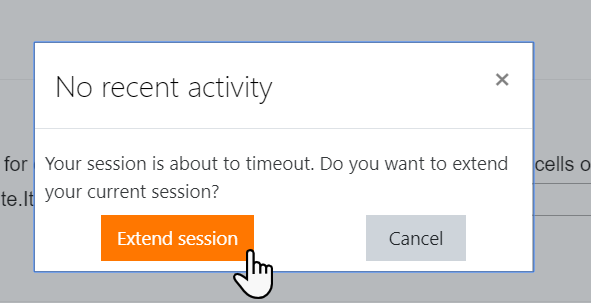
Timeout Warning
Users who are near the session time-out limit for your site will receive a pop-up dialogue box asking if they want to extend their session time. Clicking the Extend Session button will reset the timeout clock for them.
Admin Tip
Most sites are configured to time out users after two hours of inactivity. If you'd like to extend this, open a support request (opens in new window) in the Open LMS support portal.