Creating and Managing Courses
4. Bulk Creating Courses via CSV
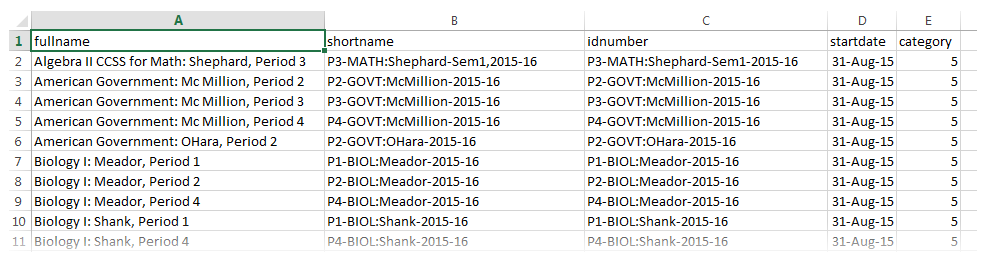
Creating courses using the flat-file method requires a .CSV file with very specific formatting to complete the upload.
The file used for uploading courses should be a text file saved as a .csv with a single record per line. The first record (row 1) contains a list of fieldnames defining the format of the rest of the file.
Required Fields
- shortname - course shortname
- fullname - course fullname
- category - must be category id numbers from Moodle (not the Descriptive titles). For help locating the category id number, view the video below.
Additional, Optional Fields
- idnumber - course ID usually used by your SIS/ERP to help match enrollments to the course
- visible - 1 if the course is visible, 0 for hidden
- startdate - this value is passed to the PHP function strtotime to generate a timestamp so include a human readable startdate such as: 26 Sept 2015
- summary - text to include as course summary
- format - must be a valid course format plugin name such as weeks, topics
- delete - to delete a course (will match shortnames) include 1 to delete, leave blank to update or create
The list of courses provided from your enrollment manager may have all the information needed, but not in the required format. If you need help with getting your data in the right format, take a look at the tutorial on manipulating data with Excel.
Important Note: CSV files must be opened with notepad or renamed as .txt and then opened in Excel to assure any leading zeros on user idnumbers and courseIDs are retained.
Uploading the CSV file
Once the CSV file is in the correct format with the appropriate information included, go to: Site Administration > Courses > Upload Courses. You will be able to upload the CSV file, make any changes to defaults, and receive an immediate confirmation for the course creation.